
 Highlighting the creative magic behind post-processed photos
Next week brings our last ABFriday of 2014, as I’ll be untethered from my laptop while I spend time with my family over the holidays. (Don’t despair – we’ll be back in January!) If you want to join in before year’s end, take a look at the ABFriday Forum page for the how-to’s, as well as for the schedule for the next four weeks. In the meantime, thanks to all who submitted this week – I just love opening up your emails to see the treasures inside!
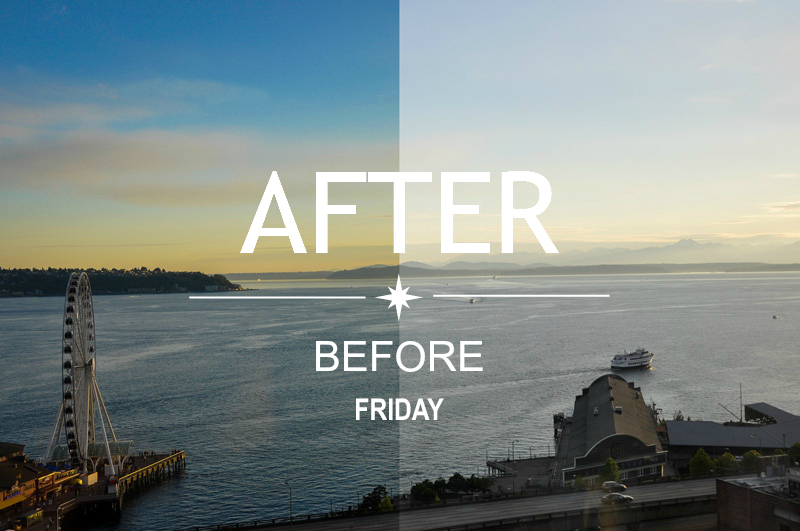
My submission: Last week, Emilio commented that my video didn’t have very many steps (though he then said it was because the image was a good one to start with – thanks for that, Emilio!). Well, be careful what you wish for, I always say, and hold on to your hats, because this week you might want to pour yourself a glass of wine, sit back in a comfortable chair, and put your feet up to watch! At a whopping 25 minutes, it’s my longest, but it’s packed full of information: I begin with noise reduction using Nik Dfine 2, follow with post-processing in Lightroom 5, and finish with filter enhancement in Nik Color Efex Pro. (And after I finished the video, I ended up adding a few more edits: lightened the glass on the two lampposts in the foreground and changed the crop aspect.) If you stay with me through it all, you’ll win a prize — my undying gratitude and utmost respect, and a toast from my own glass of vino! 😉


Submitted by Robin Kent — PhotographybyKent


Robin says: This week I selected a “Reject” image from four years ago to see if a heroic rescue could be achieved. As it turned out, I had to depart the confines of realism and explore various hallucinogenic treatments to find something that might be of interest. You can see the details here.”
Submitted by Janice Meyers Foreman — jmeyersforeman photography


Janice says: Three images to make one final image, so the computer did all the hard work this week!
Submitted by Sabina — Victim To Charm


Submitted by Emilio Pasquale — Photos by Emilio


Emilio says: June of 2012. We had been married less than 2 months when her sister invited us on a camping trip to Yosemite. Neither of us had ever been there and neither of us were campers. I had slept in a sleeping bag only once in college. I will not go into the particulars of this trip except to say that none of us showered for the 5 days and nights we were there. On the way home my wife and I were so miserable that we almost stopped at a local justice of the peace to get divorced. We have plans to visit other national parks in the future but have discussed a motor home of some type. I think, though, we’ll probably opt for cheap motels when the time comes.
Safe to say we are neither of us made of pioneering stock.
Submitted by Loré Dombaj — Snow’s Fissures and Fractures


Loré says: The only interesting thing I did was using Focal B&W effect, which gave me nice fadeout from the center of the image. I hoped this would work well with the frosty vignette, achieving a soft transition from a very colorful little snowman to that frosty edge. Nothing spectacular, but it was a helpful experiment for future ideas. In past I had trouble with that frosty vignette, it just didn’t look good on any image, I am glad I figured out how it can work.
Submitted by Benjamin Rowe — Aperture64


Ben says: This week I am sharing an image that has been three years in the making and finally it is finished. You will be able to find it here.
Submitted by Leanne Cole — Leanne Cole Photography


Leanne says: When I went to the Block Arcade on this particular evening I was so surprised to find it with no one in it. For about 2 or 3 minutes I was there taking these photos no one entered, it was like a dream come true for me. So I quickly took some images. Most didn’t work because my ISO was too low, but I just had to go for it, I knew if I stopped to muck around with settings or put my tripod up, the moment would be gone. The only downside to the whole thing was that the shop right at the end was still open and there were people in it. So my challenge for this image was to remove the trace of people and close the shop and try to make the arcade look like it was closed, or had been closed for some time, like it was stuck in time. I don’t know that I quite achieved that, but I am still fairly happy with what I got. I do need to get more textures though, ones that are more suitable for this sort of image.
Visit Leanne’s post on her art blog, Leanne Cole — Fine Art Photographer, to read about her post-processing.
Submitted by Nic Anderson — Photography by Nic


Nic says: I took this photo when I had no idea what I was doing. I had a new camera (my first dSLR) and a new lens (70-300mm) and was wanting to capture a photo of the harbor seals in La Jolla Cove, CA. I just happened to catch one sticking out his tongue! Throughout my education I learned about composition and post-processing, and continued to come back to this image to see if I could ‘fix’ it. I could probably still tinker with it because I know even more now than when I made this After image. But there is something about leaving a photo alone after you’ve been ‘working’ it for so long.
Visit Nic’s post to read about her post-processing.
Submitted by Michelle Lunato — Michelle Lunato Photography


Michelle says: I took this photo while shopping at the Mall of Georgia with my 16-year-old son. We were in some gift store and I saw this crystal tree on the table. I stopped to take a few pictures, and my son didn’t even care:) I showed him my blog and he seems to think its actually kind of cool! Cool mom points ~ Whoo hoo! Anyway, I did some editing to it, but I haven’t written those down yet. Once I do, that will be at this link: After Before Forum~Week 29. Shiny Baubles!
Submitted by Amy — The World Is a Book


Amy says: For this egret photo, I used the Lightroom. I cropped it first, then brought the highlight to maxi and dialed shadow and white down also increased the black in the Basic box. This process made the white bird pop up even more. I then went to the Tone Curve box and increased the black and the light, which brightened up the yellow color of leaves a little bit. I then removed the spots and added vignette effect. Voila!
Please click on the links of those who contributed this week, to read about their post-processing steps and/or to see what other treasures they have on their blogs. They’d love to have you visit!
So what do you think of the ABFriday forum?
Feel free to leave your thoughts and suggestions in the comment section. And don’t forget to view the guidelines if you want to participate. I’d love to have you onboard!

I don’t mind being blamed for the length of this tutorial as it was very informative. I’m surprised at many of the similarities between Nik Color Efex Pro, which you use, and Perfect Effects 8, which I use. I found myself agreeing with every choice you made in your processing and the comparison between before and after is really dramatic. Great job Stacy.
LikeLike
Emilio, my apologies for “missing” your comment in my queue! Thanks, first of all, for watching ALL 25 minutes 🙂 And thanks, second, for your kind words. Interesting to hear about the similarity between Perfect Effects 8 and Color Efex Pro. I really do love the Nik Efex suite (though I still haven’t used all of the apps). My go-to’s are Color Efex, Silver Efex, and Dfine (for noise removal). Who makes Perfect Effects?
LikeLike
OnOnesoftware.com
LikeLike
Thanks!
LikeLike
What a wonderful collection of photos and edits! I love the seal picture. The edit really highlighted the exchange between the two there. And the mountain shot edit just gives it more BAM. I will have to go look at all the blogs now to see how they did all this.
LikeLike
Hi, Michelle! It is SO much fun to see what other’s have done, isn’t it? I’ve learned so many cool things from the posts everyone has contributed, and what’s nice is that they’re all available to go back to and re-read when I find myself needing to use the techniques someone has spelled out 🙂
LikeLiked by 1 person
That was a great tutorial, Stacy! After watching this, I may have to get Nik Color Efex. 🙂 I love the parts were it was like a vignette only smother and you could change the center point, and I love what it did to the clouds. Great After image.
LikeLike
Thanks, Nic! I really do love Color Efex – there are so many offered presets, but I’ve found my handful of favorites. At some point, I’ll have to branch out 🙂 Glad you found something helpful!
LikeLike
So, I made my rounds and now I am back.
I hope I’ll learn how to do all those things you do with your images, because I think you always find a balance in your editing choices, so the after image turns out very natural.
As for Victor’s note on learning theory vs tinkering with Photoshop, I am not sure one should be separated by the other. I can tell from my experience, trying to improve my photos via post-processing just pushes me to make better quality images and learn more about technical aspects. Because, by trying to manipulate the image, I realize what I’ve done wrong and what I should do different or better next time I am taking pictures.
LikeLike
Loré, I love what you’ve said about editing and theory!! You are so right. I wish I had thought of that reply 🙂 Thanks for you kind comment on my editing process. I’d love to be at the stage where only a few minor tweaks are needed, things one couldn’t necessarily accomplish in camera. But until then, I’m glad I can help the images along in the digital darkroom 🙂
LikeLike
@Sabina, subtle change from before to after, but it’s oftentimes these that really can make a difference. The glimmer in the water pops more, as do the details of the boat. It’s a wonderfully calming image, and I keep going back to it for its calming influence as chaos seems to exist around me!
LikeLike
Sometimes better not to know what it was before. I think that better to spend time and to learn theory of photography and to get better results with the optic and knowledge then to waste it on Photoshophing and digital recovery of the lost poxels.
LikeLike
You’re absolutely right, Victor, but until that time, it’s nice to be able to rescue photos that one may not have the chance to take again.
LikeLiked by 1 person
Coming from being taught theory in a Darkroom, the same things happen on the computer as it did in the darkroom, with just as much to even more time being spent on a image. It is always good to improve your knowledge and to take the best exposure with the best lens with the best light, this though is not always the case.
LikeLiked by 1 person
Oh, I like how our numbers go up! Will visit and comment on every individual post.
LikeLike
I know, Loré, it’s so exciting!
LikeLike