 Highlighting the creative magic behind post-processed photos
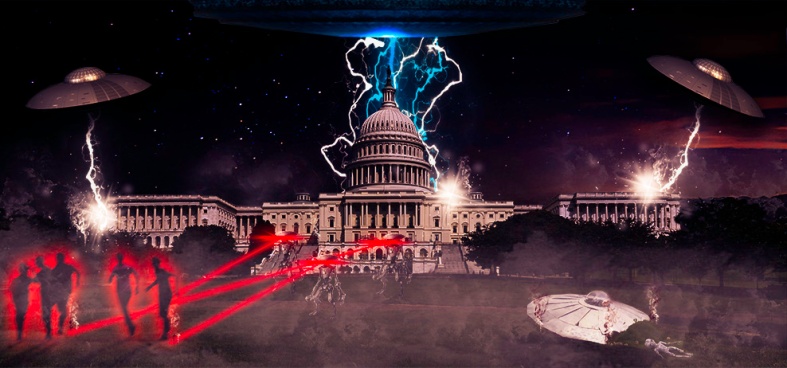
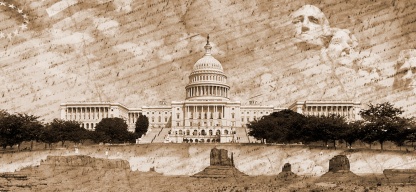
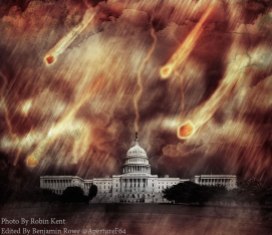
Welcome to ABFriday’s monthly One Photo Focus! This month, 27 photographers are sharing their post-processing interpretations of one “before” image submitted by Robin Kent of PhotographybyKent. From patriotic to apocalyptic (and everything in between), this month’s group certainly had a lot of fun with Robin’s image of the United States Capitol in Washington, D.C.!
We begin with Robin’s “before” image, followed by the “afters,” and at the end, a gallery of all so you can watch the changes as you scroll through. Be sure to click the links to each participant’s blog as many have written posts “uncovering the magic” behind their “after” images. And if you would like to participate in August’s One Photo Focus and/or ABFriday in general, you’ll find all the details on the After-Before Friday Forum page. We’d love to have you join the party!
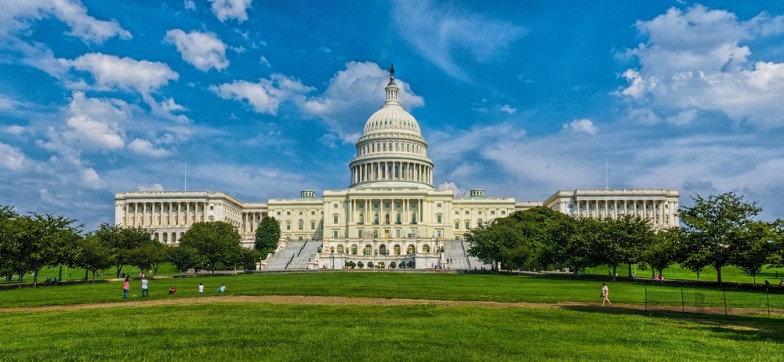
BEFORE PHOTO
Submitted by Robin Kent — PhotographybyKent
Robin says: I dipped into the filter options available in Photoshop and found some interesting new ways to distort reality.
Submitted by Stacy Fischer — Visual Venturing
Admission: There is only a partial video for my image. Why? Because I tried out new techniques in Photoshop and went back and forth and up and down, with frequent trips sideways, to get to my final result … and I didn’t write anything down. When I went back into Photoshop to try and recreate what I had done in preparation for making the video, I couldn’t do it. So much for learning something new.
What I can tell you is that I imported into Photoshop Robin’s image and the flag and firework background. I used the quick selection tool to select the Capitol in Robin’s image. When I was happy with my selection, I hit copy, switched to the flag picture, and hit paste, creating a second layer. From there, I increased the size of the Capitol until I was happy with how it looked on the background. But for the life of me, I can’t remember how I made the Capitol black and white. I do remember adjusting color sliders though, so maybe it was through a hue/saturation layer. For all you Photoshop gurus out there, please tell me how I can add an adjustment layer to a selection. I’m driving myself crazy. But herein lies the beauty of this forum. Help is always given and learning progresses.
I actually was going to skip the video this time around, but then I figured I could at least show you how I accomplished the compositing of the two images (after I made the video, I double-checked to make sure that’s what this technique is called). How I did it is at a very basic level, but, hey, we all start somewhere 🙂 I also decided to try out WordPress’s VideoPress function, which they have just upgraded. So for those of you who watch, let me know if you have any issues.
In the end, I do hope you enjoy my 4th of July interpretation of Robin’s image. Given that the West lawn of the White House (depicted here) is the site of the annual D.C. 4th of July concert that ends with a huge fireworks display, this seemed like a fitting treatment! Thanks, Robin, for such a great and timely image!
Submitted by Karen Chengelis — KCinAZ
Karen says: Thanks, Robin for another challenging shot. I enjoyed taking my twist at it but did stick with traditional editing. You can read about my editing at http://wp.me/p2pU8K-Ra.
Submitted by Laura Macky — Laura Macky Photography

Laura says: My recent movie outing to Jurassic World inspired it, lol!
Submitted by Cee Neuner — Cee’s Photography

Cee says: I really like the wide scope to the Capitol Building because it stands so grand in all its glory and the photo is extremely well balanced. However, since I like much closer up photos, I decided to do a major crop on the capitol building and then decided to turn it into a dramatic black and white photo.
Submitted by Julie Powell — Photographic Jewells
Submitted by Kirsten Aufhammer — IKA Photography
Kirsten says: Since, it is July 4th weekend I decided to edit Robin Kent’s wonderful photo with a patriotic theme in mind. I wanted to try something outside of my comfort zone, so I went with a watercolor painting technique I learned in my Photoshop Artistry Class.
Submitted by Helen Chen — HHC Blog
Helen says: I did the normal thing like cropping, sharpening… etc. I then converted it to black and white, and since I didn’t miss the color, I decided to keep it as black and white. Later, feeling like to celebrate 4th of July, I found a bigger flag to add it into the photo.
Submitted by Stacey/Lensaddiction — Learning to See Light
Stacey says: Lensaddiction (the Other Stacey) had fun adding in iconic American images to Robin’s fabulous photo of the White House, to create a quintessential snapshot of the US from an outsiders POV.
Submitted by Emilio Pasquale — Photos by Emilio
Submitted by Max 510 — Max510’s Blog

Submitted by desleyjane — Musings of a Frequent Flying Scientist


Desley says: This month, I’ve gone with three editing variations: natural, atmospheric monochrome and a fun&funky one. Thanks to Robin and Stacy, this was good fun!
Submitted by Raewyn — decocraftsdigicrafts
Raewyn says: I just played around with Camera Raw and some of the filters in Photoshop.
Submitted by Chris — sv-takeiteasy
Chris says: Reading about the US Capitol, the age of this imposing building and the passage of time were the aspects I wanted to emphasise in my edit.
Submitted by Katie Prior — Drawing with Light

Katie says: I knew when I saw Robin’s wonderful image of the US Capitol that I wanted to turn it black and white, click here to see how I did it!
Submitted by Amy — The World Is a Book

Submitted by Klara — Sliku svoju ljubim II
Submitted by Joanne Ritchie — Coffee Fuels My Photography!
Joanne says: On seeing this iconic image I was reminded what this represented to so many and for how long it has been a part of history books, something I wanted to highlight with my editing.
Submitted by Nic Anderson — Photography by Nic
Submitted by Nancy Merrill – nancy merrill photography
Nancy says: This month, I wanted to try out some of the fun bells and whistles that come with Photoshop. For this image, I used a Fine Are Gallery setting, preset sepia toning, and an interesting brush to clear away the center of the gradient mask. Thanks, Robin, for a fun image to play with!
Submitted by Benjamin Rowe — Aperture64
Submitted by Michelle Lunato — Michelle Lunato Photography

Michelle says: Since my schedule seems to never at a point of calming down, I decided to go with whatever edits I could come up with in my 15 minutes before leaving for work. Here is what I got from my no-time-to-second-guess moments…
Submitted by Jaime Perez — My Photolanguage

Jaime says: This time, we have a splendorous panoramic shot from Robin, as he use to (congrats Robin, I really like it!). I hope he (and all of you) have no problem with the alteration I tried, but if I would have been in Robin’s shoes, this is the image I would have liked to get. I’m looking forward to seeing other’s versions!
Submitted by Nancy / dogear6— Living the Seasons
Nancy says: Thanks to Stacy and Robin for another month of ABFriday! While other months had tough technical challenges to the photos, this month was hard because the photo was so nearly perfect already. What do you do with that?
I started with some minor adjustments in Lightroom, mostly to improve the white balance and take the yellow cast off the building. Since I don’t know this scene, I assumed the building was mostly white but it could be yellowish! I cloned out some of the foreground people so that when I started playing with the picture, they didn’t interfere with the appearance. That one is always a tough call; sometimes I think pictures look nicer without people and other times a scene looks too sterile. I also moved the bottom up slightly to hide the fence at the right.
I improved the picture some more with Topaz Adjust HDR Dynamic Pop, at which point I realized the sky had a fair amount of noise. I used Topaz DeNoise Raw Strong to remove that. At this point, I put a border around it to finalize it.
However – and there’s always a however for me – what I wanted was to convert it to a pen and ink drawing. That so did not work, mostly because of the sky. I’m not sure if using DeNoise was the reason, but while the buildings looked great, the sky looked weird.
In the course of playing with it though, I liked the looks of Topaz Impressions Watercolor 4. It removed detail from the building, but I liked the ethereal effect it gave. I used onOne for a torn paper border and that turned out to be my favorite.
For more information and to see what didn’t work, visit my blog at http://wp.me/pow9k-2rt.
Submitted by Marsha Leith — CoolQuilting
Submitted by Lynne Ayers — Beyond the Brush Photography
Submitted by Ritva Sillanmäki — Ritva’s Art Photography
Please click on the links of those who contributed this week, to read about their post-processing steps and/or to see what other treasures they have on their blogs. They’d love to have you visit!
So what do you think of the ABFriday forum?
Feel free to leave your thoughts and suggestions in the comment section. And don’t forget to view the guidelines if you want to participate. I’d love to have you onboard!


What a great variety of interpretations. Love the vast themes. p.s. My internet is finally back up!! Whew….
LikeLike
Yay!!!
LikeLiked by 1 person
Stacy, I love these posts. It’s simply amazing for me to see all the possibilities with just one photo. Really, really fun.
I hope you are enjoying the 4th.
LikeLike
So glad you’re enjoying them, Alys 🙂 It IS always fun to see what others have come up with! And, yes, I had a great holiday weekend, thanks. You??
LikeLike
We had a nice weekend too and here it is already Monday night. It’s always a bit jarring after a long weekend to get back to the routine.
LikeLike
So glad you did! As my aunt used to say, “If you’re gonna play, you’ve gotta pay.” 😀
LikeLike
She sounds like fun!
LikeLike
And you’d be right 🙂
LikeLike
🙂
LikeLike
There were some fantastic edits this month.
LikeLike
How right you are, Raewyn 🙂
LikeLike
wow, the skill and creativity of all, something to aim for to keep up with the skill of these photographers.
LikeLike
And what I love is that everyone is willing to help each other out in understanding how they accomplish what they did, Ritva 🙂 So glad you’ve come aboard as I’m looking forward to learning from you as well!
LikeLiked by 1 person
A great group of submissions again this week! I was really bogged down this week and didn’t get a chance to write up my tutorial. But like you (and I) said I don’t really remember what I did because I kept changing and redoing things until I came up with this final image. Good luck on your continuing education of Photoshop, it looks like you are figuring things out pretty well. 😀
LikeLike
Where does the time go, right?? I’m just delighted you were able to send in your photo, Nic! As for PS, time and help from all of you should be the ticket 🙂
LikeLiked by 1 person
Fantastic jobs by everyone !
Love particularly the funny ideas of Laura, Julie and Ben !
Thanks to everybody and to Stacy !
See you next month !
Ciao ciao from the hot Italy !
Max
LikeLike
Thank YOU, Max! 😀
LikeLiked by 1 person
Thank you max! It was a fun one for sure. 🙂
LikeLiked by 1 person
I love your final composition, so perfect for this weekend. Happy holiday to you, your family and your blog followers
LikeLike
Thanks so much, Janice! We miss you …
LikeLike
I will be back before too long, but I must get settled into my new routine first? Keep up the good work
LikeLike
We had the same idea with our 4th of July theme, Stacy!! I love your fireworks. Great edit! And thank you so much for hosting this fun challenge! You asked about applying an Adjustment layer to a selection. I think the easiest way would be to do a clipping mask. Make sure your selection layer is directly below you adjustment layer. With the adjustment layer highlighted right click on it. A pop up list will come up, select “clipping mask” from the list. This will apply the adjustment layer to only your selection. I hope that’s what you were asking…if not please ignore my rambling 😀
LikeLike
Kirsten, thanks so much for this info. I can’t wait to try it out!! Tomorrow – as I’m supposed to be getting ready for hosting a BBQ for 18 people right now. LOL 🇺🇸🎉
LikeLiked by 1 person
Happy 4th of July!! Have a wonderful BBQ, Stacy!!
LikeLike
😀
LikeLike