
 Highlighting the creative magic behind post-processed photos

Before we get to the after-before galleries, just a reminder that today’s post reveals the March ABFriday One Photo Focus photo! What is One Photo Focus? It’s the first ABFriday of each month when all participants edit the same photo. Fun? You betcha! Check out February’s 1PF!
In a nutshell, here’s how it works:
- The photo to be edited is revealed in the ABF post two weeks in advance.
- If you’d like to join, email me at visualventuring@gmail.com. I will send you links to the full-sized RAW and jpeg files. Download the one you wish.
- Email me your “after” image no later than midnight EST Wednesday, March 4, two days prior to the post.
A time zone converter and all the important submission details are on the After-Before Friday Forum page, as are the details for participating in “regular” ABFriday posts. Come along and join us in one or the other (or both) – we’re a pretty fun group!
March’s One Photo Focus Photo!
Submitted by Loré Dombaj — Snow’s Fissures and Fractures
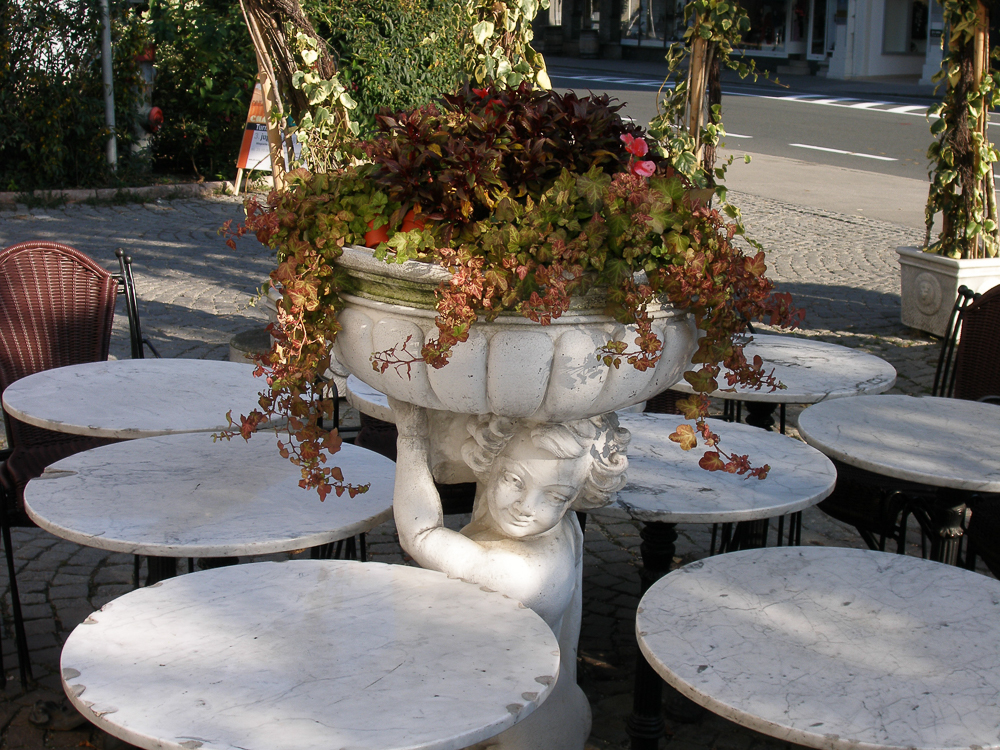
Scene from a Salzburg cafe
Now back to our regularly scheduled ABFriday post with all the creative after-before photos submitted this week!
My submission: This week I’ve chosen a photo from a recent visit to Willemstad, Curacao (a port of call on our southern Caribbean cruise). Just off the pier sat the beautiful Renaissance Curacao Resort and Casino. The gorgeous blue of the Caribbean sky, the deep greens of the palm trees, and the vibrant yellow of the resort cried out to be photographed. I post-processed this photo in Lightroom 5, using three adjustment brushes loaded with different presets I’ve purchased from Serge Ramelli. (Note, you can load your own adjustment brushes with the settings you see in my screenshots to create the same effects.)
First, the After and Before:
 Stacy Fischer, Visual Venturing")

Second, a photo gallery to display my steps:


 - Sky Drama (Mask)")
 - Sky Drama (Effect)")
")
")
")
")

")
")
Submitted by Amy — The World Is a Book
 Amy, The World Is a Book")

Amy says: I made some change through Lightroom. First, cropped the photo, did the highlight, shadow, etc. on the basic panel; then increase the sharp to 60, and dark the background. I then went to the online Google photo editing to add the vignette.
Submitted by Loré Dombaj — Snow’s Fissures and Fractures
 Loré Dombaj, Snow's Fissures and Fractures")

Loré says: I remember it was a middle of a very hot, summer day and the sun was very bright. I liked the composition and the movement, but I was never very fond of washed out colors. With my editing skills little bit improved, I decided to play again with this image.
Submitted by Anne-Cécile — UnClicUnePhoto
 Anne-Cecile Gohier,")

Anne-Cécile calls this: “When the roundabout is illuminated, it sometimes loses its color.”
Submitted by Katie Prior — Drawing with Light
 Katie Prior, Drawing with Light")

Katie says: This week I have been concentrating on correcting exposure from a difficult image. I have used the graduated filter and dodging and burning techniques using the adjustment brush to try to bring some detail and colour back.
Submitted by Michelle Lunato — Michelle Lunato Photography
 Michelle Lunato, Michelle Lunato Photography")

Michelle says: When I stumbled across last week’s 2002 Hawaiian palm tree photo to edit, I also found this gem. My kids were my models back then. They actual got so used to the camera, I think they thought it was attached to my face. So they just did their thing and I snapped away. They were in this spinning tube and clearly, I was not paying attention to my settings. I was just snapping away in effort to capture their precious expressions. After looking at the pictures though, I was very disappointed. But, years later, I was able to “recover” these pictures with a little Photoshop magic. I may even get it printed now:)
Submitted by Nancy Merrill — nancy merrill photography
 Nancy Merrill, nancy merrill photography")

Nancy says: I was doing a shoot for a high school senior at my sister’s yard when I came across this pine cone sitting in the grass. I found it intriguing and couldn’t resist snapping a picture of it. When I opened the file, I wanted to do something to make it a little more interesting. I didn’t do a lot of post-processing, but I had fun cropping it nice and close.
Submitted by Emilio Pasquale — Photos by Emilio
 Emilio Pasquale, Photos by Emilio")

Emilio says: This shot was taken looking through the window of a bar at around 9 am on a Sunday morning. The bar was closed. See? Even in Las Vegas there is a sense of propriety. I stopped to admire the window dressing; all the colored bottles lined up on the glass topped bar and lit from below, the cleanliness and orderliness of the place, the lights left on to entice any passers-by to come back when the bar is open! Anyway, this was shot as part of my series on the hotels and casinos of the Las Vegas Strip. This is a separate, enclosed bar inside the Mandalay Bay.
Submitted by Benjamin Rowe — Aperture64
 Benjamin Rowe, Aperture64")

Ben says: This week I wanted to do a more simplistic edit in lightroom compared to the previous weeks. you will be able to find my post here.
Submitted by Mary Hone — Tales from the Backroad


Visit Mary’s post to read about her post-processing.
Please click on the links of those who contributed this week, to read about their post-processing steps and/or to see what other treasures they have on their blogs. They’d love to have you visit!
So what do you think of the ABFriday forum?
Feel free to leave your thoughts and suggestions in the comment section. And don’t forget to view the guidelines if you want to participate. I’d love to have you onboard!

First of all, I was done with processing my OnePhotoFocus image in few minutes. What are you people doing? I thought this would be a simple one, but now you make me think I need to go back and create something otherworldly.
Second, I love the colors in the after, true to my idea how Caribbean sky looks up close and personal. All that stuff about adjustment brush and presets are just going over my head. I really need to start learning new things.
LikeLike
Really nice, subtle changes have definitely improved this image, it is so much sharper and has loads of punch now, great job! I didn’t know that you could add presets to the adjustment brush either, Lightroom has SO much in it, and loads to learn! 🙂
LikeLike
Thanks, Katie! Glad you learned something new from the slideshow 🙂 I’m using the presets in the Week 38 video, so you can get a better idea of how to access them.
LikeLiked by 1 person
I shall look forward to it Stacy! 🙂
LikeLike
Reblogged this on UnClicUnePhoto and commented:
First time I participate to the ABFriday of Stacy ! 🙂 Check my post and the other !
LikeLike
Oh, I haden’t saw the post ! It is so great, I love it ! Thanks Stacy and very good job to all 🙂
LikeLike
So glad you like it, Anne-Cécile! Thanks so much for participating 🙂
LikeLike
Hi, Stacy. Great post. Sorry I have been absent this month but traveling without the Internet does pose some obstacles (but gives one more shooting time). Anyway, now that I am catching up, it’s good to get back although I don’t know what in the world I will do with Lore’s One Photo Focus image. As for this week’s ABFriday roundup, it’s great to see some new faces. And I see you are illustrating the process in a different way. Works pretty well, as best as I can tell. And I love the idea of Selective Sharpening. I’ll have to see how to do that in Photoshop.
LikeLike
Robin, I’m so delighted your back! I’ve seen your two wonderful posts but just haven’t had a chance to comment on them (as you see, I’m just getting caught up on ABF!). My new process of illustrating my workflow is a result of my being out-of-town and on a slower internet connection. I wanted to do my typical video, but it just wasn’t working for me. Videos will return next week 🙂 Let us know if you find the ability to selectively sharpen in PS. I love the ability to do that in LR, though using that slider is still a global effect.
I have to confess I’ve already finished my work on Loré’s photo and it pushed me into doing something I’ve never done before – and this is a good thing. It will be fun to see what everyone comes up with!
LikeLiked by 1 person
Very subtle use of the brushes. I love it. It doesn’t overpower! Serge taught me everything I know but his site now seems more concentrated on selling. His youtube videos are free and priceless! 🙂 He has tutorials on LR, PS, Nik Efex, and a few others.
LikeLike
You were the one who introduced me to Serge, Emilio! You’re right about the commercial aspect of his site. I get about 5 different emails a week about some promotion or other, which can be very annoying, but then it’s a reminder to check out his YouTube videos. I have so many in my queue – I just have to find the time to watch them! But these adjustment brush presets sounded like a great idea and it was something I didn’t know you could do with them. So it was worth the sale price 😉
LikeLike
Yes, his products are always on sale. They start at $400, but this week on sale for 50% off and if you buy today, an additional 30% off. When you finally make a purchase, his $400 tutorial may cost only $59! But I love his use of highlights. You’ll see what I mean when you watch more of his tutorials.
LikeLike
Crazy sale prices! Makes me wonder if he’s overpricing his products at the full “retail” price 😉
LikeLiked by 1 person
And now I have to check that Serge dude. Sigh…so many things to do.
LikeLike
LOL, Loré 😀
LikeLiked by 1 person
I really like how the sky and trees have more pop and the sharpening really emphasizes the oomph. I learn so much about Lightroom from you. 😀 I was traveling on Tuesday so I wasn’t able to join this week, and as usual I didn’t have anything prepared before then. This week’s participants look great, I’m going to go visit them individually. 😀
LikeLike
Missed having you here, Nic, but thanks for stopping in and commenting! And I know everyone will appreciate you visiting them. Hope to see you here this week 🙂
LikeLiked by 1 person
Thanks! 😀
LikeLike
🙂
LikeLike
Fantastic use of the adjustment brushes bringing life to your picture. Great collection of contributions this week and Lore’s image has got me scratching my head.
LikeLike
Thanks, Ben. I wanted to get away from Nik Efex this week and concentrate solely on Lightroom, since more have or are familiar with this program. It was interesting to learn about creating presets for the adjustment brush (which also can be used with the radial and gradient filters). As for Loré’s photo, yes, a challenge and one that will push me, at least, to try some new things!
LikeLiked by 1 person
This is a great place to exchange ideas and learn more. Thank you, Stacy! 🙂
LikeLiked by 1 person
Agree with Amy! 😉 I am always looking forward to seeing this post!
LikeLike
Thanks so much, Helen! I hope to see you here sooner rather than later 🙂
LikeLiked by 1 person
Thanks so much, Amy. It wouldn’t work without all of you participating, so thanks so much for being a part of this! I wanted to leave a comment on your blog about your photo, but without a post, I hope you don’t mind that I leave it here. I really appreciate that you shared your workflow here. The red rose absolutely jumps off the page! Beautiful. One question I have about your statement that you went to Google online photo editing to add the vignette – is there a reason you like that instead of creating the vignette in Lightroom?
LikeLike
So I had no idea you could load a preset onto the adjustment brush. Must go figure that out. I love what you did and what a great photo to start with.
LikeLiked by 1 person
I didn’t know that either! I have to figure it out too and try it out.
LikeLike
Mary and Nancy, it was news to me too 🙂 I so wanted to do a video this week, but I’m traveling and the gallery was much easier for me to accomplish. I will try to find another picture for this week where I can showcase the use of presets again using a video this time. By the way, adjustment brush presets can also be used with the radial and gradient filters!
LikeLiked by 1 person