 Highlighting the creative magic behind post-processed photos
1 video and 7 photo galleries from 7 photographers. If you’d like to participate, guidelines are on the After-Before Friday Forum page. NOTE: For those viewing the post in the Reader, if the slideshows don’t load, please visit the original post.
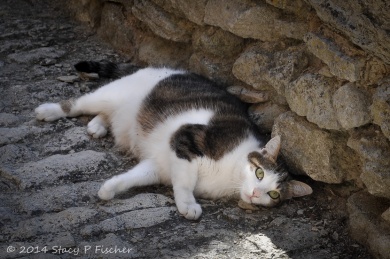
My submission: This week, I’m post-processing a photo that I originally posted in black and white and submitted to Leanne Cole’s and Laura Macky’s Monochrome Madness challenge. Madhu, at The Urge to Wander, commented that she might like the color image even better. So, Madhu, this one’s for you! For the tutorial, I’m going to post-process the color file, highlighting the use of the adjustment brush and radial filter. I’d be interested to hear any thoughts, either on the photo itself or on the tutorial. Also, if there’s anything you’d like me to focus on in an upcoming tutorial, I’d be happy to try to oblige!
I’ve also included the after and before images.
Submitted by Laura Macky — Laura Macky
Laura says: Fourth of July was supposed to be about fireworks, but in San Francisco the fog rules the sky and fireworks were not that visible from where I was standing. So what does one do when given lemons? Yup, make lemonade! I photographed the sailboat passing in front of Alcatraz and in my mind’s eye saw a painting. During post process I used Photoshop CC in addition to Nik Color Efex. I topped it all off with a texture overlay from the Adobe Extension Manager.
Submitted by Loré Dombaj — Snow’s Fissures and Fractures
Loré says: This is the image I took earlier this year in Milan. I was drawn by the straight lines of the buildings and that brick facade. First I processed the image in Picmonkey where I adjusted exposure by decreasing brightness and increasing shadows. Then I adjusted colors by increasing saturation. After that I added few effects, but to be honest, I have no idea which and in what order. I think in future I’ll need to take step by step notes. Next, I processed already changed image in Pixlr.express, where I only added one more effect. In the end, I finally used Gimp to change that little piece of sky. It was my first time with Gimp, so I used the existing pattern, although I would rather use a different kind. But my patience was running out of the door, so I left it as it is. In the end I am quite satisfied with the final image. I think the shadows and the colours give it a new DOF and the entire image looks richer. Or so I hope.
Submitted by Jaime Perez — My Photolanguage
Jaime says: A bit different this time, a family portrait. Happily, four generations in a row together!
Submitted by Emilio Pasquale — Photos By Emilio
Emilio says: At first glance- even at second and third glances- this appears to be a set or model. I’m not sure why. The angle perhaps? But it is a real building against a real mountain with a very real vintage bus and a very real vintage truck parked alongside. How long the building may stand is anyone’s guess. I would say any minute now it might crumble to the ground.
Submitted by Benjamin Rowe — aperture64
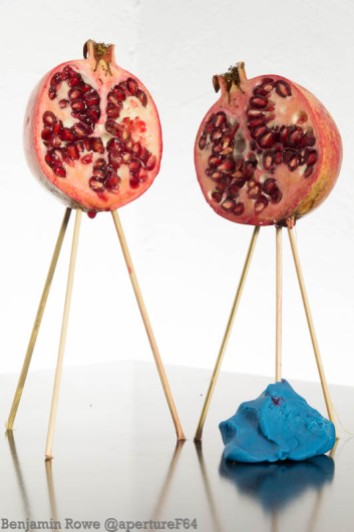
Ben says: My post will be live here.
Submitted by Robin Kent — PhotographybyKent
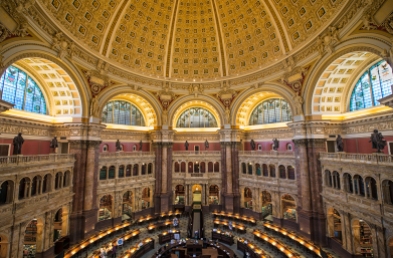
Robin says: Normally, taking this photograph is not permitted. It shows the Reading Room in the Library of Congress and was taken from a balcony overlooking the space. The balcony provides the only good view of the space for tourists because access to the Reading Room is restricted to researchers who must have an ID card to get in. But while this spot prohibits photographs (so as not to disturb the readers below) many other parts can be toured (and photographed) during open hours. But for every rule, there is an exception. Twice each year, the Library has an “Open House” and visitors are allowed into the Reading Room and pictures can be taken there and from the balcony.
So with only two chances per year, one doesn’t want to mess up. The “After” image here was processed first in Adobe Camera Raw and then final changes were made in Photoshop. CS6. While it may not appear tmajor surgery was needed here, first impressions can be deceiving. A more detailed explanation can be found at the post on my blog. Thanks again to Stacy for managing this forum and also to the other photographers who participate. I have learned a lot from all of their examples.
Please click on the links of those who contributed this week, to read about their post-processing steps and/or to see what other treasures they have on their blogs. They’d love to have you visit!


Thanks to all, for the great and thoughtful entries this week! Temporarily have a good internet connection so I will be able to visit your blogs and comment there on your posts 🙂
LikeLike
Hi Stacy, I’m also very happy every time we are more; congrats! By the way, “it seemed to me as if I had seen a beautiful little cat”!
LikeLike
Me too, Jaime 🙂 As for the cat, fun to revisit her in all her color 🙂
LikeLike
This was an excellent group of submissions. I liked them all. In each case, the photographer created a compelling image. It’s great to see the wide range of techniques used and the impressive results that were achieved.
LikeLike
I always have fun opening up the images everyone sends – it’s like Christmas all the time 🙂 Thanks, Robin!
LikeLike
Wow those are really cool! I loved watching your LR process too. I think I’m going to really enjoy this challenge.
LikeLike
Thanks, Laura, and we’re really enjoying having you part of it 🙂
LikeLike
You’re welcome! I’m looking forward to the next one. 🙂
LikeLike
We are growing in numbers while I’m growing around the middle! Good thing my wife loves portly men! Anyway, yes, I always forget to thank Stacy for hosting this. It must be work for her, too, the way she has it set up.And she continues to post her own image WITH A VIDEO! I am such a slacker!
LikeLike
Ha, Emilio! And you’re so very welcome. It’s a lot of fun — though I admit, sometimes the videos are challenging – many times I have to start over because I get too long-winded 🙂 But I love that in recreating what I have done to explain it to others, it’s making me much more aware of my editing choices and the reasons behind them. I find myself really thinking about why I did what I did, and I know each of you has said that as well. So glad to have you part of the forum!
LikeLike
We are growing in numbers!!! That is great. Love the images and what all of you’ve done with them.
LikeLike
Yes, we are, Lore, and how fun is that?! Thanks so much for your wonderful submission!
LikeLike